This page answers many of the frequently asked questions regarding SConnect.
This page describes how to install SConnect.
When you open a page that uses SConnect and needs installation or update, you will see a Terms and Conditions dialog.

Click Accept and Install or Accept and Update.
After you accept the Terms and Conditions, an installation guide will show in the middle of the page.

Click the first image in the installation guide.
After clicking, a popup will open and take you to the SConnect Extension page in the Chrome Web Store.

Click the button at the top right of the page to start installing the SConnect Extension.
After this, a confirmation dialog will appear in the middle of the page.


Click Add extension to confirm the installation.
After the Extension is installed, a dialog will appear at the top right of the page showing the Extension Host download status.


Wait until the download finishes, then click it to start installing the SConnect Extension Host.
After you start, a dialog will appear in the middle of the page showing the installation progress.
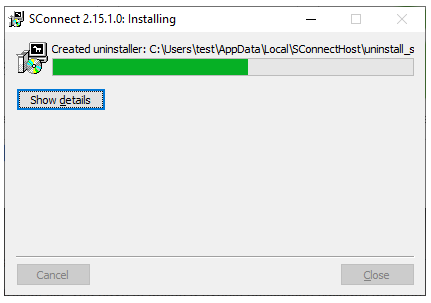
When installation is done, the dialog will close by itself.
After you start, a dialog will appear in the middle of the page to guide you through the installation.
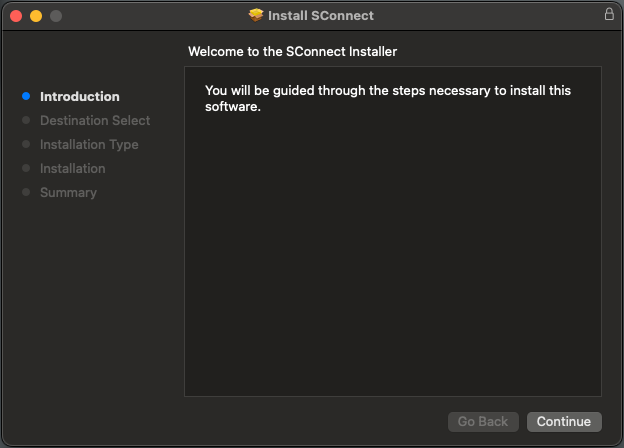
Click Continue
To be sure SConnect installs in your user space, go to step Installation Type.
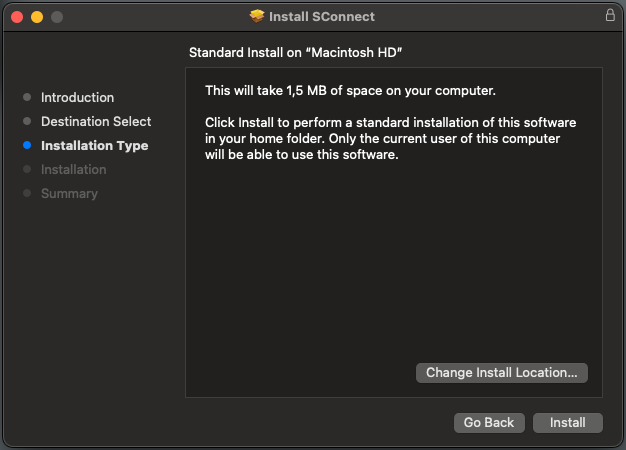
Click the Change Install Location button.
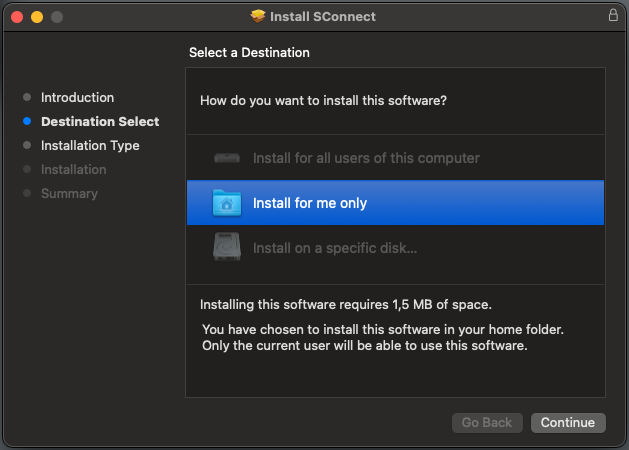
Make sure Install for me only is selected, then click Continue.
Follow the instructions until the installation finishes.
After you start, the .tar.gz package will be extracted and the Files app will open in the Downloads folder.
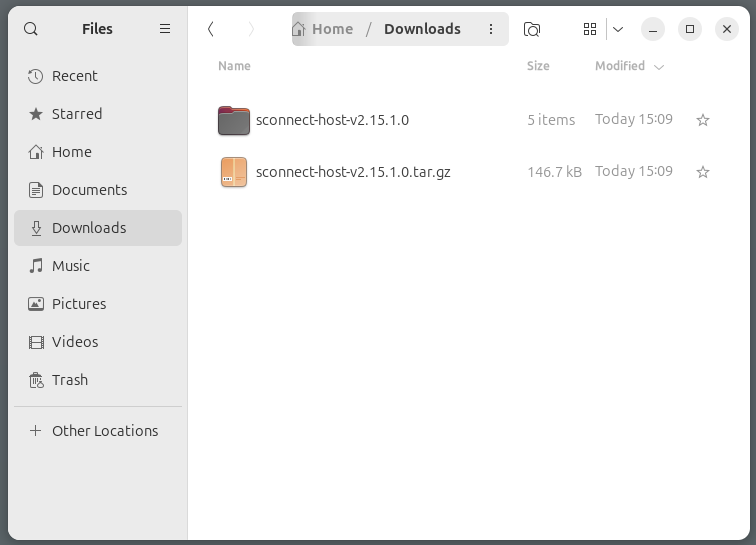
Click the folder named sconnect-host-vx.x.x.x to open it.
Note: This is the default behavior on Ubuntu 24.04 LTS. If your system is different, use your favorite .tar.gz extractor to open the files and use the Files app to go to the extracted folder.
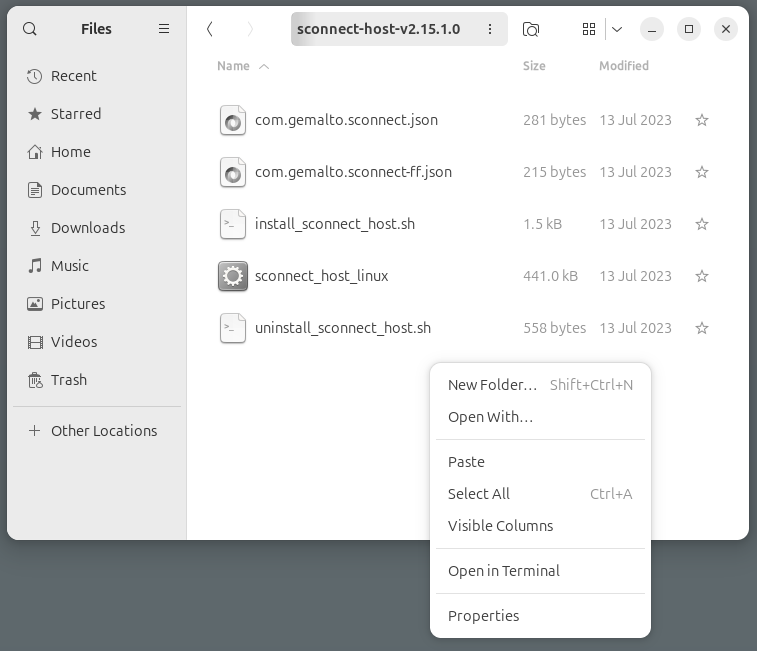
Right-click on empty space in the folder window and choose Open in terminal.
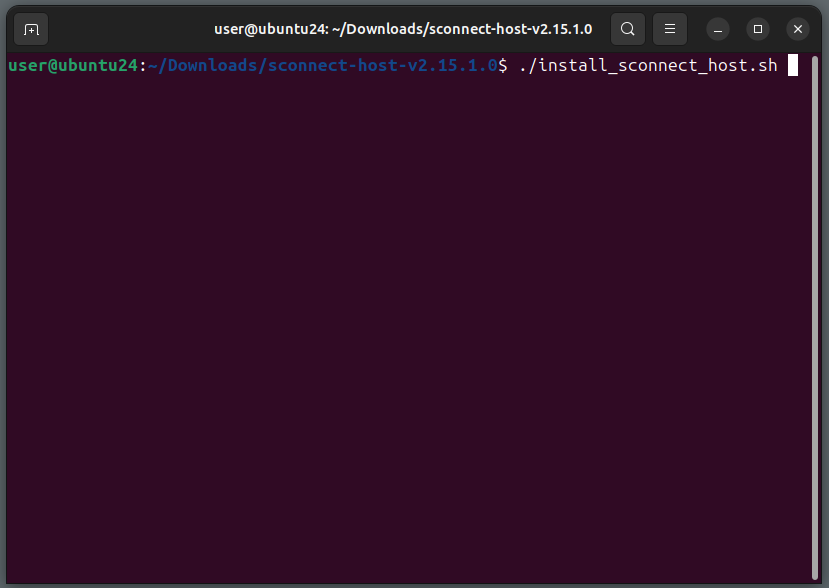
Type ./install_sconnect_host.sh and press Enter.
After the Extension Host is installed, a dialog will appear asking you to approve access to the native host from the current website.
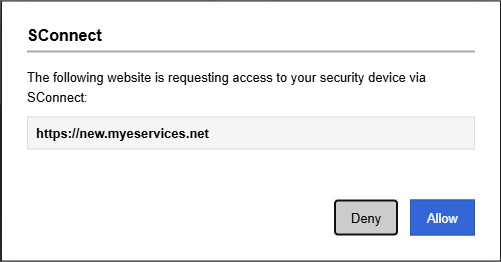
Click Allow to grant access.
When installation finishes, the page will reload automatically and you can start using SConnect.
Note: The Firefox "snap" distribution is not supported. Please use the .deb or .tar.gz Firefox from the official Mozilla website.
When you open a page that uses SConnect and needs installation or update, you will see a Terms and Conditions dialog.
Click Accept and Install or Accept and Update.
After you accept the Terms and Conditions, an installation guide will appear in the middle of the page.

Click the first image in the installation guide.
A dialog will open at the top right corner of the page.


Click Continue to Installation to allow the installation. The dialog will change.


Click Add to add SConnect to your browser.
When installation finishes, the SConnect was added window will open.


Click Ok.
After the Extension is installed, a dialog will appear at the top right corner of the page showing the Extension Host download status.

When the file is downloaded, click on sconnect-host-vx.x.x.x.exe.

When the file is downloaded, click on sconnect-host-vx.x.x.x.pkg.

When the file is downloaded, click on sconnect-host-vx.x.x.x.tar.gz.
After you start, a dialog will appear in the middle of the page showing the installation progress.
When installation finishes, the dialog will close by itself.
After you start, a dialog will appear in the middle of the page to guide you through the installation.
Click Continue
To be sure SConnect installs in your user space, go to step Installation Type.
Click the Change Install Location button.
Make sure Install for me only is selected, then click Continue.
Follow the instructions until the installation finishes.
After you start, the .tar.gz package will be extracted and the Files app will open in the Downloads folder.
Click the folder named sconnect-host-vx.x.x.x to open it.
Note: This is the default behavior on Ubuntu 24.04 LTS. If your system is different, use your favorite .tar.gz extractor to open the files and use the Files app to go to the extracted folder.
Right-click on empty space in the folder window and choose Open in terminal.
Type ./install_sconnect_host.sh and press Enter.
After the Extension Host is installed, a dialog will appear asking you to approve access to the native host from the current website.
Click Allow to grant access.
When installation finishes, the page will reload automatically and you can start using SConnect.
When you open a page that uses SConnect and needs installation or update, you will see a Terms and Conditions dialog.
Click Accept and Install or Accept and Update.
After you accept the Terms and Conditions, a dialog will appear at the bottom of the page asking you to confirm the Extension installation.

Click Run to start downloading and installing the Extension.
When installation finishes, the page will reload automatically and you can start using SConnect.
Note: The SConnect Settings toolbar and menu will be available only after you restart the browser.
When the update finishes, a dialog will appear at the top of the page asking you to restart Internet Explorer.

Restart Internet Explorer to finish the update. After restart, you can start using SConnect.
When you open a page that uses SConnect and needs installation or update, you will see a Terms and Conditions dialog.
Click Accept and Install or Accept and Update.
After you accept the Terms and Conditions, an installation guide will appear in the middle of the page.

Click the first image.
A small dialog will appear in the middle of the screen.

Click Allow to give permission to open the App Store.

In the App Store window, click Get to download and install the Extension.

When the Extension is installed, click Open to register it in Safari.
The SConnect initialization window will open.

Close the SConnect initialization window and go back to Safari. Open the Safari menu.

Select Safari->Settings... from the menu.

Click the Extensions tab and turn on the SConnect extension by checking the box.

Click the Always Allow on Every Website... button.

Click the Always Allow on Every Website button to confirm.
Restart Safari to finish the installation. After restart, you can start using SConnect.
When you open a page that uses SConnect and needs installation or update, you will see a Terms and Conditions dialog.
Click Accept and Install or Accept and Update.
After you accept the Terms and Conditions, an installation guide will appear in the middle of the page.

Click the first image in the installation guide.
After clicking, a popup will open and take you to the SConnect Extension page in the Chrome Web Store.

Click the button at the top right of the page to start installing the SConnect Extension.
After this, a confirmation dialog will appear in the middle of the page.

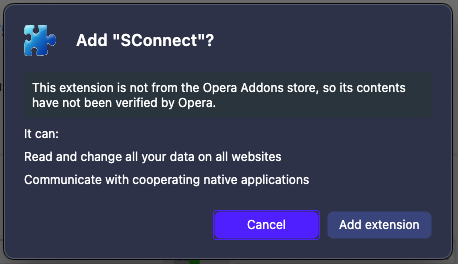
Click Add extension to confirm the installation.
A confirmation of successful extension installation will appear at the top right corner of the Opera window.


After the Extension is installed, a prompt will ask you to save the Extension Host installer.

Click the Save button.
A small dialog will then appear at the top right corner of the page showing the Extension Host download status.

After the Extension is installed, a dialog will appear at the top right corner of the page showing the Extension Host download status.

Wait until the download finishes, then double click the file to start installing the SConnect Extension Host.
After you start, a dialog will appear in the middle of the page showing the installation progress.
When installation finishes, the dialog will close by itself.
After you start, a dialog will appear in the middle of the page to guide you through the installation.
Click Continue
To be sure SConnect installs in your user space, go to step Installation Type.
Click the Change Install Location button.
Make sure Install for me only is selected, then click Continue.
Follow the instructions until the installation finishes.
After the Extension Host is installed, a dialog will appear asking you to approve access to the native host from the current website.
Click Allow to grant access.
When installation finishes, the page will reload automatically and you can start using SConnect.
When you open a page that uses SConnect and needs installation or update, you will see a Terms and Conditions dialog.
Click Accept and Install or Accept and Update.
After you accept the Terms and Conditions, an installation guide will appear in the middle of the page.
Click the first image in the installation guide.
After clicking, a popup will open and take you to the SConnect Extension page in the Chrome Web Store.

Click the Get extension button at the top of the popup window to start installing the SConnect Extension.

To allow installation from Chrome Store, click Allow.


Click Add extension to confirm the installation.
A confirmation message will appear at the top right corner of the Edge window when the extension is installed.
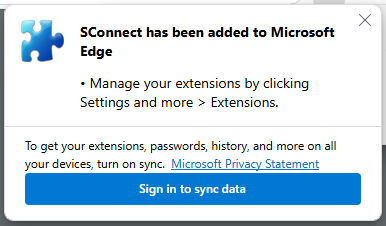

After the Extension is installed, a dialog will appear at the top right corner of the page showing the Extension Host download status.

Wait until the download finishes, then click the underlined Open File link near sconnect-host-vx.x.x.x.pkg.

Wait until the download finishes, then click the underlined Open File link near sconnect-host-vx.x.x.x.pkg.
The installation of SConnect Extension Host will start.
After starting, a dialog will appear in the middle of the page showing the installation progress.
When installation finishes, the dialog will close by itself.
After starting, a dialog will appear in the middle of the page to guide you through the installation.
Click Continue
To be sure SConnect installs in your user space, go to step Installation Type.
Click the Change Install Location button.
Make sure Install for me only is selected, then click Continue.
Follow the instructions until the installation finishes.
After the Extension Host is installed, a dialog will appear asking you to approve access to the native host from the current website.
Click Allow to grant access.
When installation finishes, the page will reload automatically and you can start using SConnect.
This page describes how to uninstall SConnect.
Open the Chrome menu by clicking the three dots at the top right corner of the Chrome window.


Go to the Extensions Manager page by choosing Extensions -> Manage Extensions.
Find the SConnect extension.

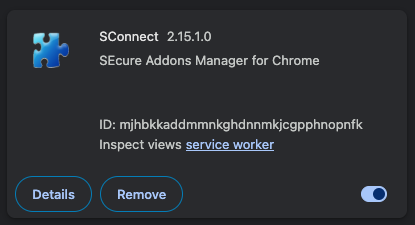

Click the Remove button.
Confirm removal by clicking the Remove button in the dialog at the top right corner of the Chrome window.
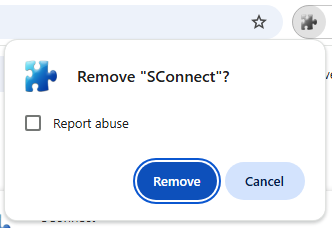


After removal, the SConnect extension will no longer appear in the list.
Click the Start menu.
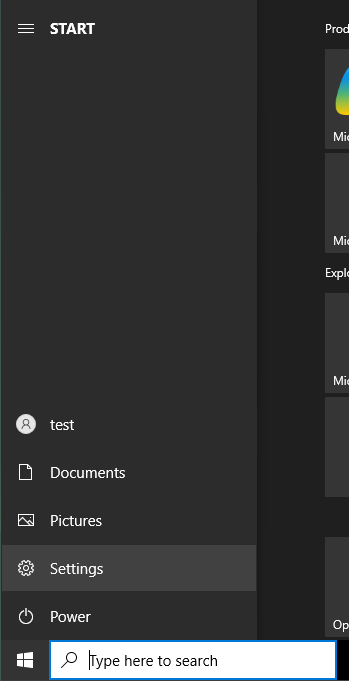
Hover over the gear icon, wait a moment, then click the Settings menu item.
In the Settings window, find and click Apps.
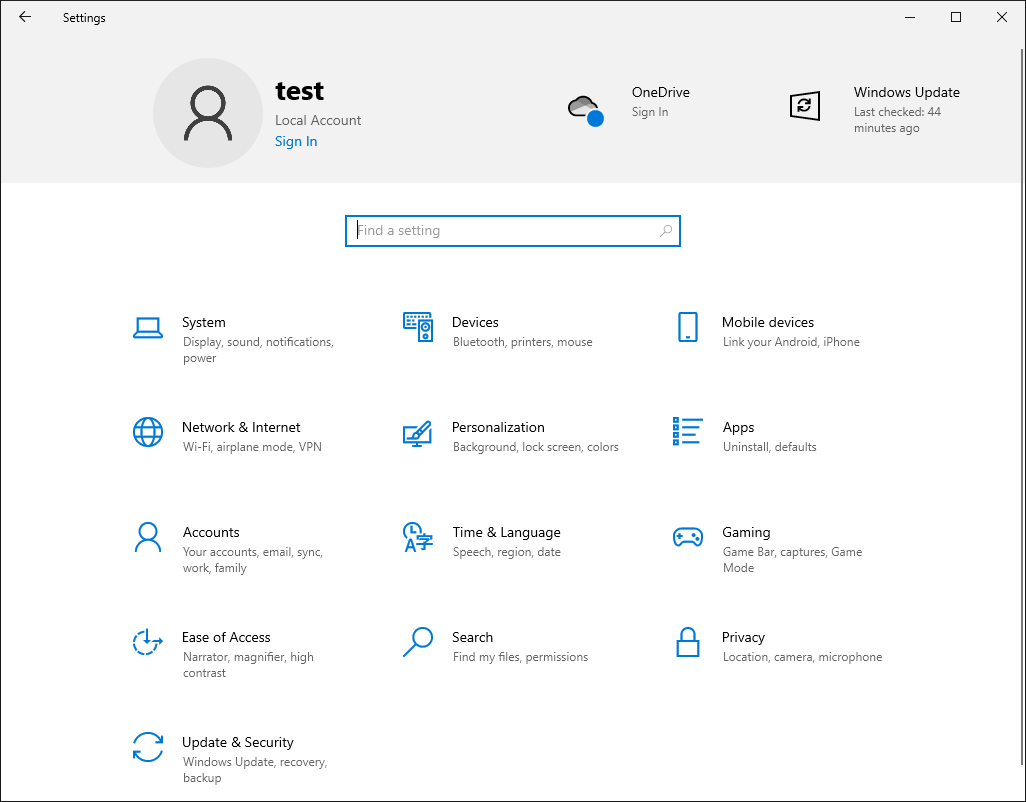
The Apps & Features page will open.
On the right side, find and select SConnect Host.
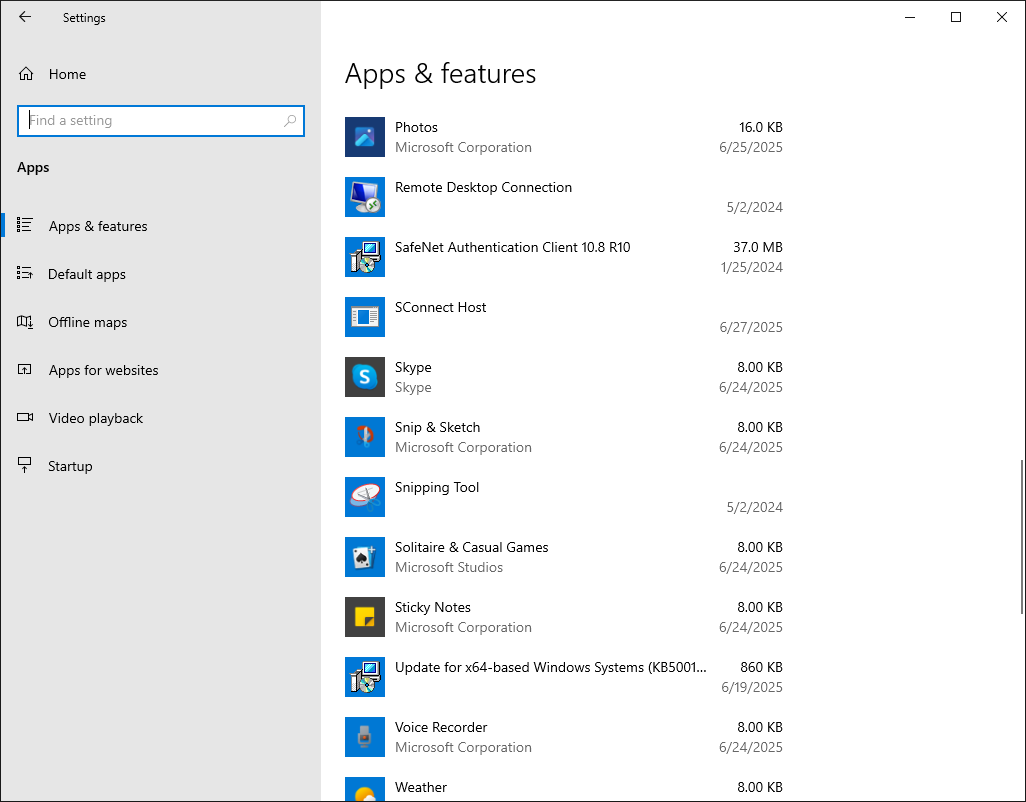
The version and buttons Modify and Uninstall will appear.
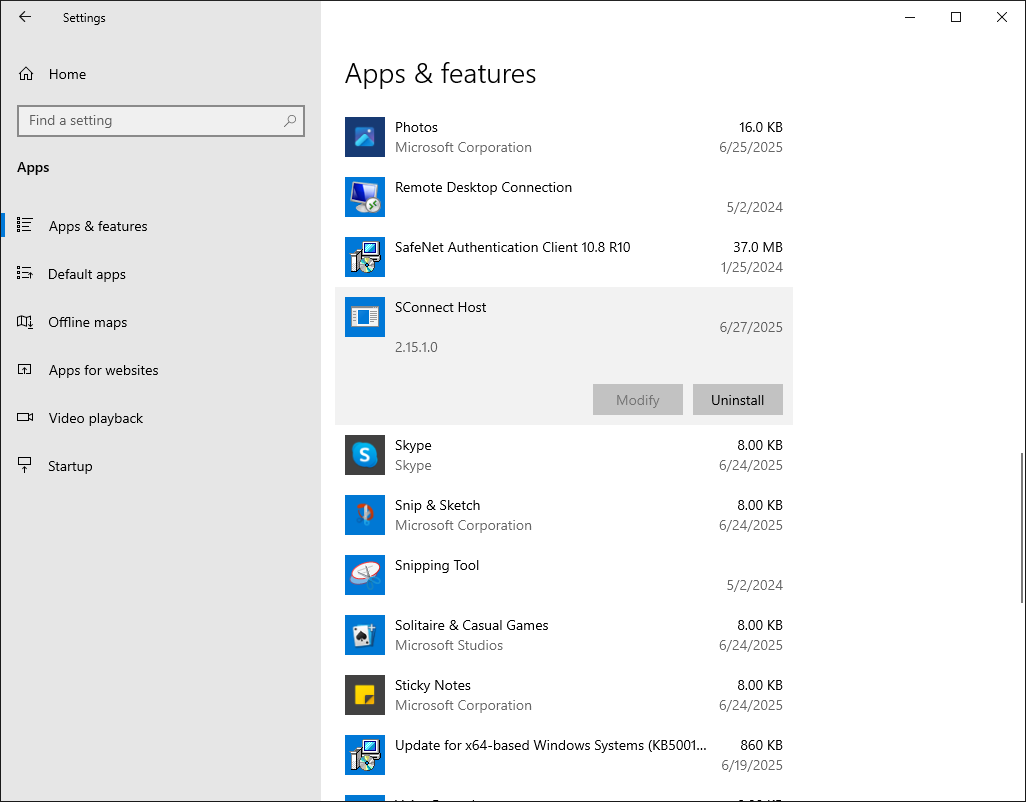
Click the Uninstall button.
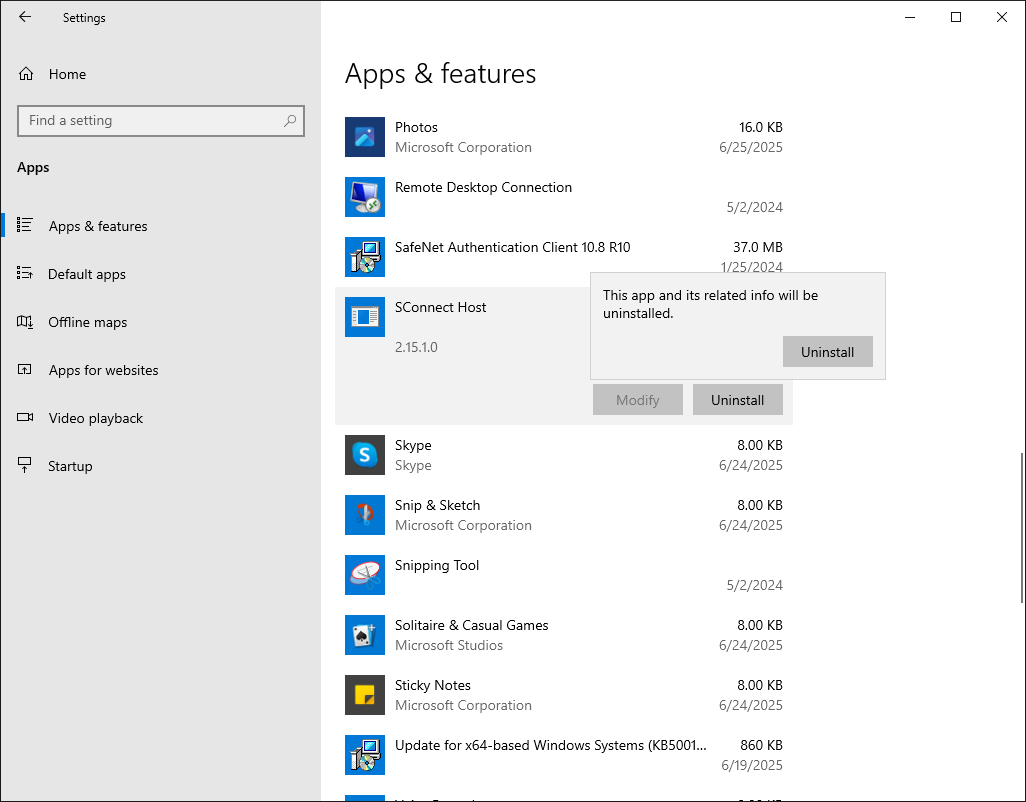
Confirm removal by clicking Uninstall in the dialog that appears.
A dialog will show the uninstallation progress in the middle of the page.
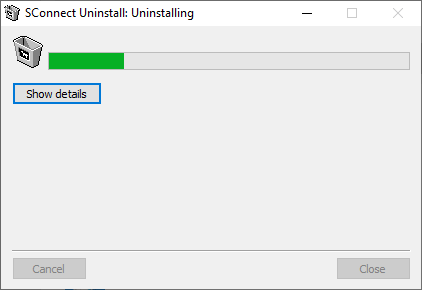
When uninstallation finishes, the dialog will close automatically and SConnect Host will no longer be listed in Apps & Features.
Open the Terminal application.
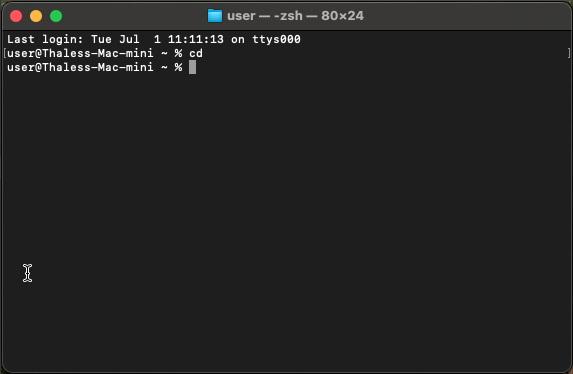
Type cd and press Enter to make sure your home folder is the current directory.
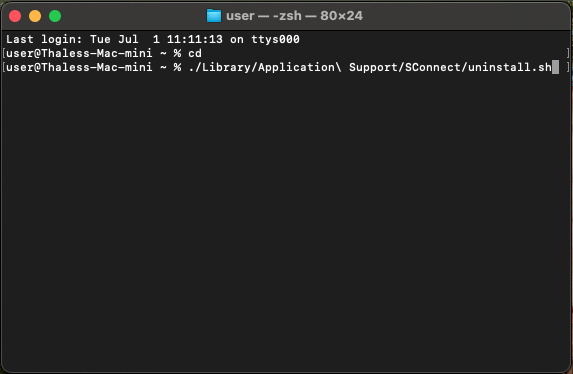
Type ./Library/Application\ Support/SConnect/uninstall.sh and press Enter.
When the script finishes, SConnect Host will be removed from your system.
Open the Files application and go to the folder where the SConnect installation files were extracted.
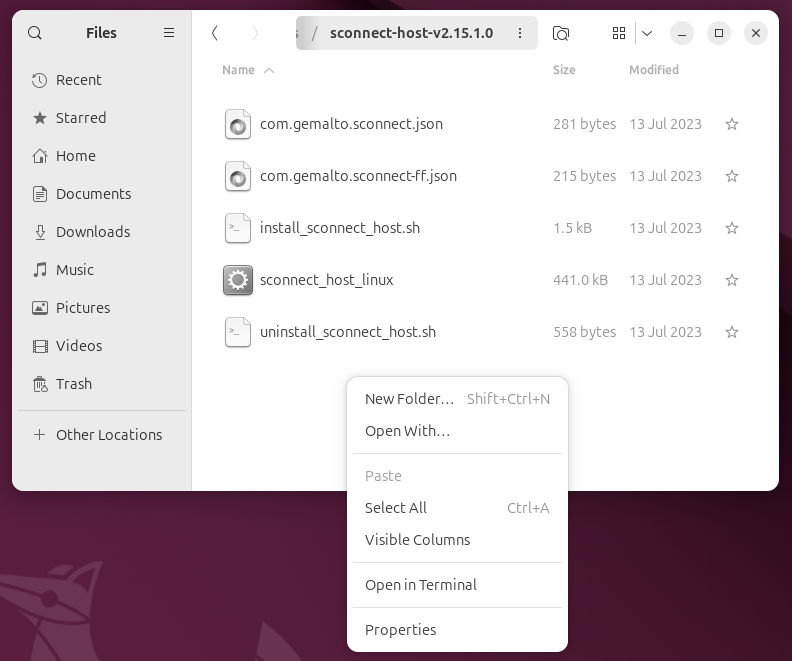
Right-click on empty space in the folder and choose Open in terminal from the menu.
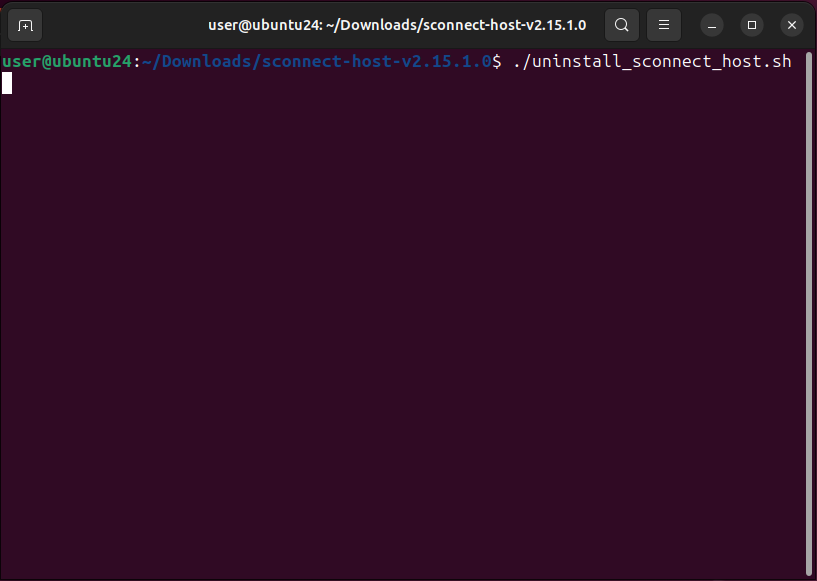
Type ./uninstall_sconnect_host.sh and press Enter.
When the script finishes, SConnect Host will be removed from your system.
Open the Firefox menu by clicking the three lines at the top right corner of the Firefox window.


Open the Add-ons Manager page by clicking Extensions and themes in the menu.
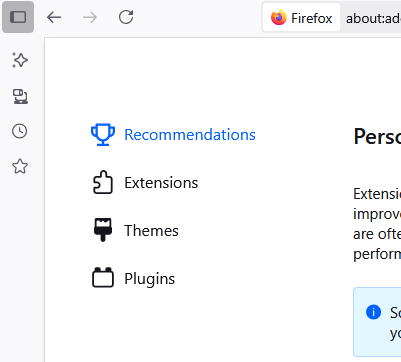
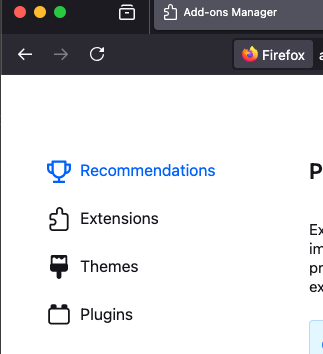

On the Add-ons Manager page, select Extensions from the left menu.
Find the SConnect extension.


Click the three dots on the right side of the extension pane.

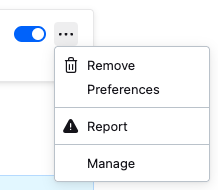
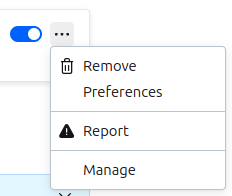
Select Remove from the dropdown menu.
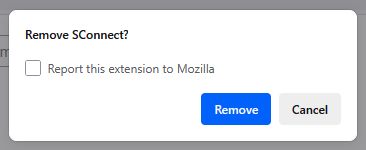
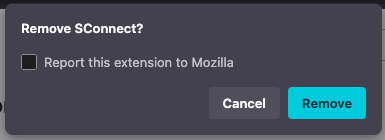
Click the Remove button in the confirmation dialog that appears.

After removal, the SConnect extension will no longer be listed in the Extension Manager.
Click the Start menu.
Hover over the gear icon, wait a moment, then click Settings in the menu.
In the Settings window, find and click Apps.
The Apps & Features page will open.
On the right side, find and select SConnect Host.
The version and buttons Modify and Uninstall will appear.
Click the Uninstall button.
Confirm removal by clicking Uninstall in the dialog that appears.
A dialog will show the uninstallation progress in the middle of the page.
When uninstallation finishes, the dialog will close automatically and SConnect Host will no longer be listed in Apps & Features.
Open the Terminal application.
Type cd and press Enter to make sure your home folder is the current directory.
Type ./Library/Application\ Support/SConnect/uninstall.sh and press Enter.
When the script finishes, SConnect Host will be removed from your system.
Open the Files application and go to the folder where the SConnect installation files were extracted.
Right-click on empty space in the folder and choose Open in terminal from the menu.
Type ./uninstall_sconnect_host.sh and press Enter.
When the process finishes, SConnect Host will be removed from your system.
Click the Start menu.
Hover over the gear icon, wait a moment, then click the Settings menu item.
In the Settings window, find and click Apps.
The Apps & Features page will open.
On the right side of Apps & Features, find and select SConnect IE.

The version and buttons Modify and Uninstall will appear.

Click the Uninstall button.
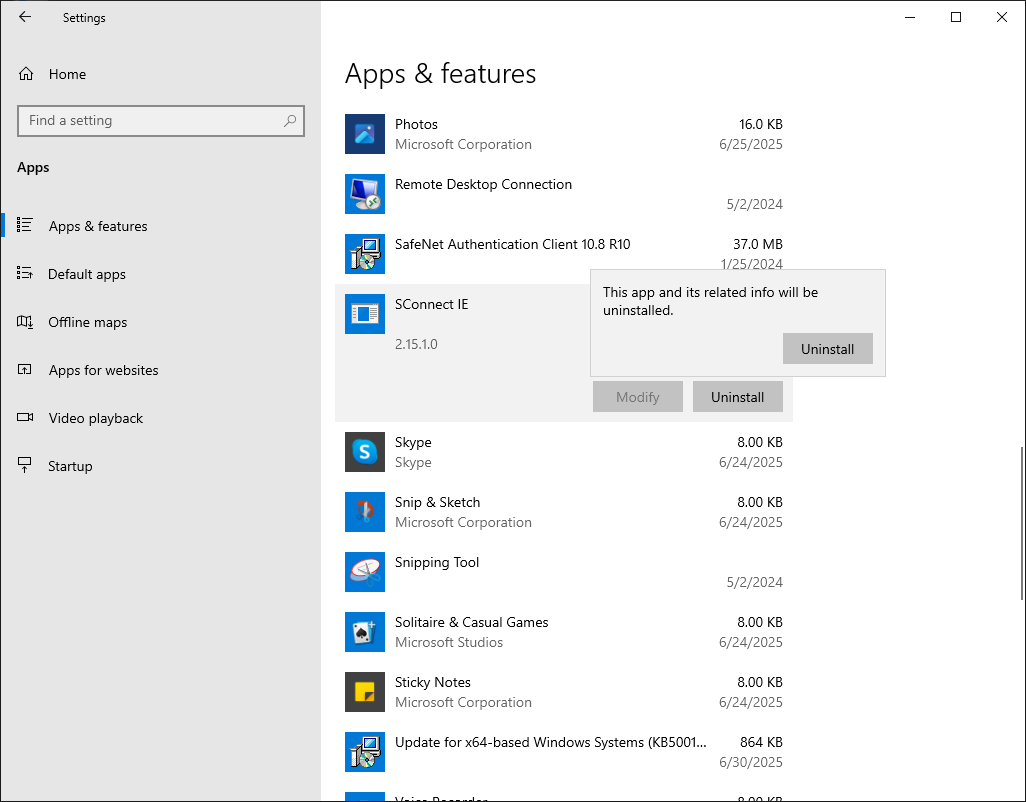
Confirm removal by clicking the Uninstall button in the dialog that appears.
After removal, the SConnect IE extension will no longer be listed.
Open the Finder application.
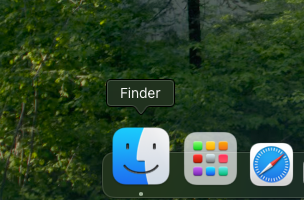
In the Finder window, find the Applications folder.

Look for SConnect.app in the right column.

Press Ctrl and click on SConnect.app.
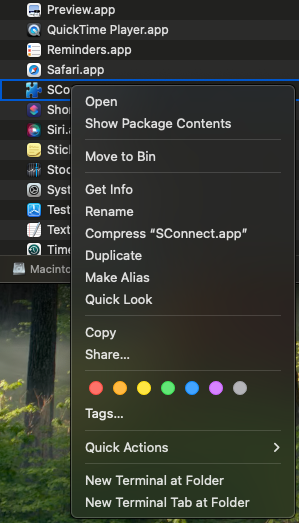
Select Move to Bin from the menu.

When asked, enter your username and password to confirm removal.
After this, the SConnect extension will be removed from Safari.

Click the Opera logo in the top-left corner of the browser window.

Go to Extensions -> Extensions menu.

In the Opera main menu, click View -> Show Extensions.
The Extensions page will open.
Find the SConnect extension.


Click the Remove button.
A confirmation dialog will appear at the top-right corner of the Opera window.
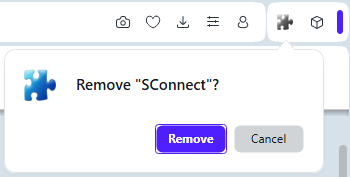

Click the Remove button to confirm.
After removal, the SConnect extension will no longer be listed.
Click the Start menu.
Hover over the gear icon, wait a moment, then click Settings in the menu.
In the Settings window, find and click Apps.
The Apps & Features page will open.
On the right side, find and select SConnect Host.
The version and buttons Modify and Uninstall will appear.
Click the Uninstall button.
Confirm removal by clicking Uninstall in the dialog that appears.
A dialog will show the uninstallation progress in the middle of the page.
When uninstallation finishes, the dialog will close automatically and SConnect Host will no longer be listed in Apps & Features.
Open the Terminal application.
Type cd and press Enter to make sure your home folder is the current directory.
Type ./Library/Application\ Support/SConnect/uninstall.sh and press Enter.
When the script finishes, SConnect Host will be removed from your system.
Open the Edge menu by clicking the three dots at the top-right corner of the Edge window.
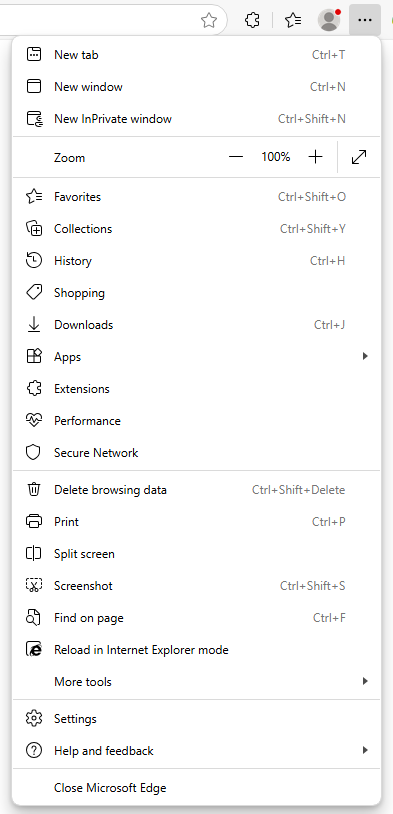

Select the Extensions menu item.
The Extensions dialog will appear at the top-right corner of the Edge window.

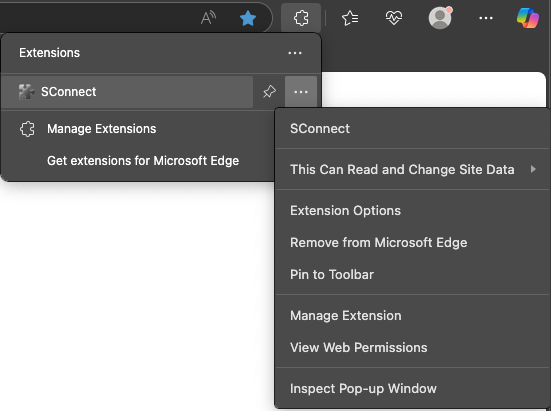
Click the three dots next to the SConnect extension and choose Remove from Microsoft Edge from the menu.
Confirm removal by clicking the Remove button in the dialog at the top-right corner of the Edge window.
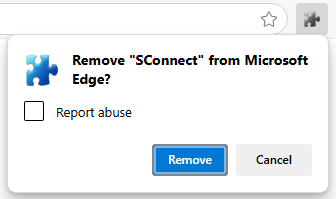
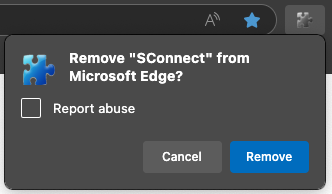
After removal, Microsoft Edge will no longer use the SConnect extension.
Click the Start menu.
Hover over the gear icon, wait a moment, then click Settings in the menu.
In the Settings window, find and click Apps.
The Apps & Features page will open.
On the right side, find and select SConnect Host.
The version and buttons Modify and Uninstall will appear.
Click the Uninstall button.
Confirm removal by clicking Uninstall in the dialog that appears.
A dialog will show the uninstallation progress in the middle of the page.
When uninstallation finishes, the dialog will close automatically and SConnect Host will no longer be listed in Apps & Features.
Open the Terminal application.
Type cd and press Enter to make sure your home folder is the current directory.
Type ./Library/Application\ Support/SConnect/uninstall.sh and press Enter.
When the script finishes, SConnect Host will be removed from your system.
This page describes the content of SConnect Status page.
The inactive state indicates that the site currently displayed in the browser's active tab is not accessing SConnect extension.

Note.
The active state indicates that the site currently displayed in the browser's active tab is accessing SConnect extension.

Note.
The blocked state indicates that the site currently displayed in the browser's active tab is trying to access SConnect extension, but being blocked by user.

Note.
See also: SConnect Settings
This page describes the content of SConnect Settings page.
This page displays the list of add-ons installed on the system.

To display detailed info about the addon, click on the info icon.

To remove the addon from the system, click on the trash icon and confirm.

This page displays permission settings and list of allowed or blocked sites.

To disallow access to SConnect from all sites by default, check the option. Otherwise, leave it unchecked.

To remove site from the list of blocked or allowed sites, click on the remove icon and confirm.

See also: SConnect Status
This page displays the current version of the SConnect.

Please select a dialog you would like more information on.
This is the timeout dialog. It occurs when the installation procedure is not completed within the specified timeframe.

Please reload the page to begin the installation again. For instructions, check the install page.
This is the ActiveX Filtering dialog.

This occurs when ActiveX Filtering is enabled in Internet Explorer. This will prevent the SConnect extension from working.
To disable this feature, perform the following steps:
If the Menu bar is not present, enable it by right-clicking above the address bar and clicking Menu bar.

If the Menu Bar is present, click Tools, then uncheck ActiveX Filtering to disable the feature.

Reload the page to begin using SConnect.
When a website tries to access SConnect and its domain has not been previously approved, the following dialog will appear.
SConnect will not allow the website to access native host functionality until the domain is approved.
Click Allow to approve access for this domain. Once approved, the website will be able to use SConnect.
Note: This dialog applies to Firefox, Chrome, Edge and Opera.
If the installed version of SConnect Native Host is outdated, the following dialog will appear when a website tries to access SConnect.
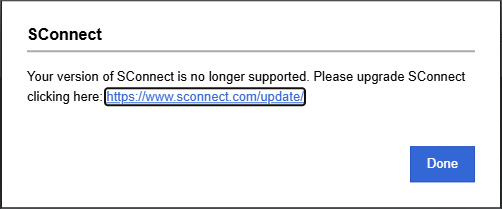
To update the Native Host, visit https://www.sconnect.com/update and follow the instructions.
After the update is complete, click the Done button in the dialog to continue using SConnect.
Note: This dialog applies to Firefox, Chrome, Edge and Opera.
Last Updated: 2026/8/4
This page describes the browsers and operating systems that are supported by SConnect version 2.16.1.0.

